2026 Best Striping Removal Equipment for Contractors
Choosing the right Striping Removal Equipment can determine whether a pavement project stays on schedule or loses hours to slow, uneven work. In 2026, contractors can compare grinders, scarifiers, shot blasters, and water-based systems for different surfaces and removal needs. Each method leaves a different finish. That matters.
This guide focuses on practical factors contractors can verify: removal rate, working width, power source, dust control, noise, maintenance, and transport. A compact grinder may suit tight parking areas, while larger machines can cover long road markings more efficiently. But speed alone is not enough. Surface damage, cleanup time, and access to replacement parts also affect the job’s real cost. Check the manufacturer’s specifications, and confirm that the machine matches the pavement, coating, and site conditions.
There is no universal winner. Old thermoplastic, thin paint, and layered markings may respond differently, even on similar pavement. A machine that performs well on a clean test strip can struggle when the coating is brittle or the surface is damp. That deserves a second look. Before purchasing or renting, ask for a demonstration on representative material and inspect the finish afterward. Compare operator visibility, vibration, and dust collection during actual use, not just in a brochure. The estimates may still miss something. This overview helps contractors shortlist equipment with clearer expectations, while leaving room for site-specific judgment.
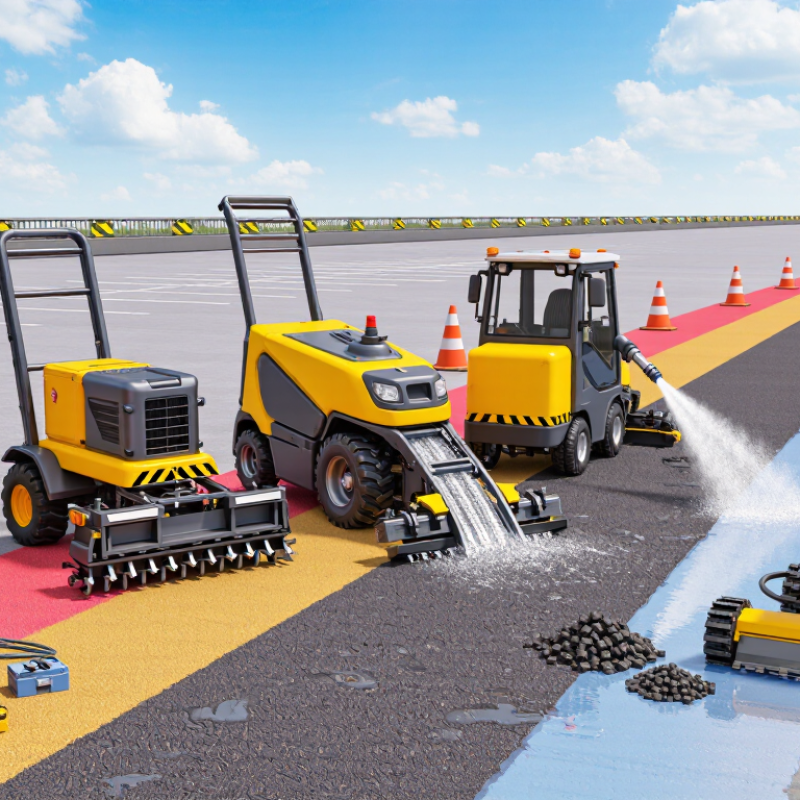
Understanding Pavement Striping Removal and Its Applications
Pavement striping removal clears obsolete lane lines, symbols, and temporary layouts before restriping or resurfacing. The aim is not simply to erase color. Crews must limit pavement damage and prevent “ghost” markings that can confuse drivers, especially in rain or at night. FHWA’s 11th-edition MUTCD gives 4 inches as the normal width for longitudinal markings; that narrow line makes incomplete removal easy to spot once a new layout is applied. Details matter.
Removal methods include water blasting, grinding, and abrasive systems. NCHRP Report 759 reviews removal approaches and their effects on pavement, underscoring that performance depends on the marking material and surface condition. A contractor should inspect a test patch first: old thermoplastic on rough asphalt may respond differently from paint on smooth concrete. Watch the edges. Water pressure can leave residue; aggressive grinding can scar the surface. Those trade-offs are easy to underestimate. Equipment selection should reflect the job’s length, traffic-control window, pavement type, and cleanup needs. I would not treat a clean-looking stripe as proof of complete removal; a wet-night check can reveal traces missed in daylight.
Main Types of Striping Removal Equipment for Contractors
Contractors commonly use walk-behind grinders and scarifiers to remove pavement markings. Rotating diamond segments or carbide cutters abrade paint and thermoplastic from concrete or asphalt. These machines suit long lines and broad areas, but aggressive settings can gouge soft asphalt. Fit matters. Match the cutting head to the pavement, then test a small section before continuing.
Shot blasters propel steel shot at the surface and collect much of it through an onboard recovery system. They can create a consistent texture, which helps when preparing pavement for new coatings. However, they may struggle with thick, rubbery markings and leave edges that need additional work. Expect trade-offs. Contractors should check shot condition, capture performance, and surface profile during operation.
High-pressure water removal systems use concentrated jets to lift markings with less mechanical abrasion. They can be useful where preserving the pavement surface is important, though water collection and disposal require planning. Hand-held grinders and scrapers help clean corners, curb edges, and small patches that larger machines cannot reach. A practical setup often combines equipment types. It takes practice. Dust, slurry, noise, and worker visibility also deserve attention; the cleanest-looking pass may still need close inspection before repainting.
2026 Best Striping Removal Equipment for Contractors
Main types compared by typical job-site strengths
Ratings use a relative 1–5 planning scale, where 5 indicates a stronger typical fit. They reflect general method characteristics—not standardized test results or guaranteed production rates. Actual results depend on the pavement, marking material, equipment setup, and site conditions.
How Removal Methods Perform on Different Pavement Surfaces
On dense asphalt, mechanical grinding can remove thick thermoplastic quickly, but aggressive passes may tear exposed aggregate and leave a dark, uneven scar. On smoother concrete, water blasting can lift paint with less abrasion, though old material may remain in pores and joints. FHWA’s 2004 Pavement Marking Handbook describes water blasting, grinding, and abrasive blasting as removal approaches. The practical lesson is that method choice depends on both marking material and pavement condition—not speed alone.
A useful field check is a short test strip. Look closely at the surface after drying: fresh aggregate, polished concrete, or a ghost line can change how the next marking looks. Abrasive blasting may work well on stubborn residue, yet it can roughen concrete or scatter debris. Water removal can leave a cleaner-looking surface, but runoff collection and drying take time. That trade-off is easy to underestimate. NCHRP Report 392, Strategies for Marking Pavement Markings, also emphasizes that marking performance varies with pavement and environmental conditions. I would still record each test area’s method, passes, and visible surface change; crews sometimes skip that step, then repeat a poor setting across the whole lane.
Comparing Equipment by Productivity, Cost, and Ease of Use
2026 Best Striping Removal Equipment for Contractors
Comparing Equipment by Productivity, Cost, and Ease of Use
Choosing striping removal equipment means balancing removal speed with surface condition, labor, and operating costs. Walk-behind grinders can suit smaller areas and tight corners, while ride-on machines often cover long, open sections faster. Water-based systems may control dust, but water handling and cleanup add time. No single method fits every pavement. A ten-minute test on a representative patch can reveal more than a brochure.
Compare total job cost, not just purchase price. Include consumables, operator training, transport, cleanup, and likely downtime. Check removal rate on the actual line material and pavement; published rates can vary with site conditions. Ease of use matters too. Clear controls, visibility, and manageable vibration help operators work consistently. I would not assume the fastest machine is best. A hurried pass can leave uneven edges or damage the surface, and rework is expensive.
Tips: Measure a sample section and record time, finish quality, and consumable use. Ask operators to test the controls while wearing normal protective equipment. Confirm maintenance intervals and parts availability before committing. Small trial, useful data. If results feel uncertain, repeat the test; one patch may not represent the whole site.
Safety and Maintenance Factors for Choosing Equipment in 2026
For contractors comparing striping removal equipment in 2026, safety features deserve as much attention as removal speed. Grinding, blasting, and scarifying can create airborne dust, noise, vibration, and flying debris. Dust travels. OSHA’s respirable crystalline silica standard sets a permissible exposure limit of 50 micrograms per cubic meter, averaged over eight hours, and an action level of 25 micrograms. These are exposure benchmarks, not estimates of a particular machine’s output. Ask whether the equipment supports effective dust collection or water delivery, and confirm controls suit the surface and work conditions. NIOSH’s 1998 occupational noise criteria recommend limiting exposure to 85 dBA over eight hours. Enclosed controls, maintained mufflers, and hearing protection can help manage noise, but actual levels should be measured.
Maintenance affects both worker protection and finish quality. Before each shift, inspect guards, extraction hoses, water lines, couplings, and emergency stops. Check cutting heads for uneven wear; a damaged or blunt tool can increase vibration and slow removal. Keep filters clean and verify airflow rather than assuming a running vacuum is working well. For wet systems, check for leaks and consistent flow around the work area. That detail is easy to miss. Follow the equipment manual for service intervals, and record repairs, tool changes, and unusual vibration. A short log may reveal recurring failures, though crews do not always keep one consistently. Choose equipment with accessible service points and replacement parts that can be inspected without awkward lifting. Operators still need training on setup, dust controls, and safe shutdown procedures.
