Choosing the right manufacturing process can shape a product’s cost, strength, appearance, and market life. Polypropylene injection molding remains a practical choice for many consumer, medical, automotive, and industrial products. It combines low material density with useful chemical resistance, fatigue strength, and moisture resistance. These qualities support living hinges, storage containers, appliance parts, caps, and lightweight housings.
John Bozzelli, a veteran injection molding consultant and founder of Scientific Molding, has said, “The mold is the heart of the injection molding process.” That observation deserves attention. A well-designed mold can produce clean edges, stable dimensions, and shorter cycle times. A poor mold may create warping, sink marks, flash, or uneven wall thickness, even when the polypropylene grade is suitable. Experience on the production floor makes this clear. Operators watch the melt temperature, injection speed, cooling balance, and packing pressure closely. Small adjustments can change a part’s feel and appearance.
The process is efficient, but it is not automatically perfect. Material shrinkage still requires careful design compensation. Thin ribs may fill unevenly. Excessive speed can trap air or create visible flow lines. These details are easy to overlook during early product planning. Engineers should test prototypes, review mold-flow results, and confirm performance under real temperature and load conditions. Polypropylene injection molding offers strong value, but only when material selection, mold engineering, machine settings, and quality inspection work together. That balance makes the process dependable rather than merely inexpensive.
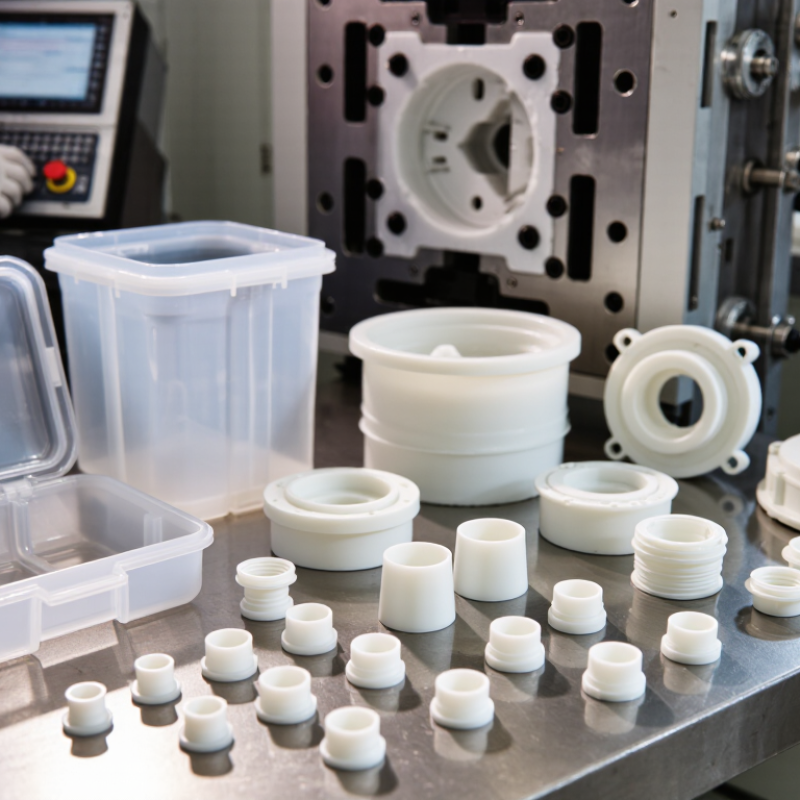
Polypropylene injection molding converts plastic pellets into precise, repeatable parts. The process begins when pellets enter a heated barrel and soften into a controlled melt. A screw then injects the melt into a closed mold under pressure. After packing and cooling, the mold opens and ejector pins release the component.
Polypropylene usually has a density near 0.90–0.91 g/cm³, according to ISO 1183 testing principles. This low density helps reduce part weight. PlasticsEurope reported polypropylene represented about 19% of global plastics production in 2022. Typical melt temperatures range from 200°C to 280°C, while mold temperatures often remain between 20°C and 80°C. Actual settings depend on grade, wall thickness, and mold design.
Small details matter. Uniform walls reduce sink marks and uneven shrinkage. Rounded corners improve material flow. Proper gate placement can prevent weld lines around openings. The International Organization for Standardization uses ISO 1133 to measure melt mass-flow rate, helping processors compare material flow behavior. In production trials, however, one test result rarely tells the whole story. A higher flow rate may fill thin sections, yet it can reduce strength or increase flash. Cooling also deserves attention. Faster cycles sound efficient, but uneven cooling may create warpage. That trade-off is easy to underestimate.
Polypropylene is a practical choice when low weight, chemical resistance, and repeatable production matter. Its low density helps reduce part weight without making the product feel fragile. It also resists moisture, many household chemicals, and repeated flexing. That makes it suitable for containers, closures, storage parts, and living hinges.
Its thermal behavior needs careful attention. Polypropylene melts at a relatively high processing temperature, then shrinks as it cools. Mold designers must account for shrinkage, wall thickness, and cooling balance. Uneven cooling can create warpage around ribs, corners, or thick sections. A smooth flow path also reduces visible weld lines.
However, polypropylene is not ideal for every environment. Prolonged sunlight can weaken unmodified parts, while low temperatures may reduce impact performance. Additives, pigments, or reinforcement can improve specific properties, but they may change stiffness, flow, or surface appearance. In production trials, I would check hinge fatigue, drop impact, dimensional stability, and chemical exposure rather than trusting a datasheet alone. It is easy to overstate polypropylene’s durability. Real performance depends on geometry, processing conditions, and service temperature. A slightly thicker wall may improve strength, yet it can increase cycle time and sink marks.
Polypropylene injection molding suits products that need low weight, chemical resistance, and repeatable production. The process begins with a practical design review. Engineers check wall thickness, draft angles, ribs, and likely shrinkage before cutting the mold. Small design errors can become expensive later.
The next step is material preparation. Polypropylene pellets are inspected for contamination and stored in sealed containers. Drying is not always necessary, but supplier guidance and storage conditions still matter. The pellets enter a heated barrel, where controlled zones melt them evenly. Meanwhile, the mold is cleaned, clamped, and brought to a stable temperature.
Then the machine injects the melt through the gate into the cavity. Injection speed and pressure must fill the mold without trapping excessive air. Packing pressure follows. It compensates for material contraction as the part begins to cool. Cooling time is carefully adjusted. Too little time may cause warping, while too much time reduces production efficiency. A balanced setting takes experience.
After cooling, the mold opens and ejector pins release the part. Operators inspect dimensions, surface marks, flash, and incomplete filling. Measurements should be recorded, not guessed. Process settings are then refined through controlled trials. The first result may look acceptable but still hide weak areas. That is where careful testing matters. Polypropylene molding is efficient, but it rewards patience rather than rushed adjustments.
| Category | Process Step or Data Dimension | Typical Value or Range | Why It Matters | Recommended Quality Check |
|---|---|---|---|---|
| Material Selection and Product Benefits | ||||
| Material property | Density of polypropylene | Approximately 0.90–0.91 g/cm³ | Its low density helps reduce part weight and material consumption compared with many higher-density plastics. | Verify the material certificate and measure part weight against the approved specification. |
| Material property | Melting range | Approximately 160–170°C | The crystalline structure melts within this range, allowing the polymer to flow into a properly designed mold. | Confirm the resin grade and set the processing profile according to the supplier's technical data sheet. |
| Performance benefit | Chemical and moisture resistance | Good resistance to water, dilute acids, alkalis, and many household chemicals | This makes polypropylene suitable for containers, closures, laboratory items, and many consumer products. | Perform application-specific chemical exposure and leakage tests when required. |
| Performance benefit | Fatigue resistance | Suitable for repeated flexing in living-hinge designs | Polypropylene can support integral hinges and snap features when the geometry and grade are correctly selected. | Run repeated-cycle testing on hinges, clips, and snap-fit features. |
| Productivity benefit | Typical molding cycle | Often approximately 15–60 seconds | Cycle time depends on wall thickness, part size, cooling efficiency, mold design, and machine settings. | Record fill, pack, cooling, and mold-open times separately during process validation. |
| Design benefit | Typical molding shrinkage | Approximately 1.0–2.5% | Shrinkage must be considered during mold design to maintain dimensional accuracy. | Measure critical dimensions after the parts reach room temperature and stabilize. |
| Step-by-Step Polypropylene Injection Molding Process | ||||
| Step 1 | Product and mold design | Draft angles commonly 0.5–2° or more | Uniform walls, adequate draft, suitable radii, and balanced flow paths help prevent warpage, sticking, and sink marks. | Review wall thickness, draft, ribs, bosses, gates, vents, cooling channels, and expected shrinkage before tooling. |
| Step 2 | Material preparation | Drying is generally not required for standard PP, but contamination must be controlled | Polypropylene absorbs little moisture, although surface moisture, improper storage, or wet additives can still cause defects. | Inspect packaging, confirm resin identification, and check regrind ratio and cleanliness. |
| Step 3 | Machine setup and barrel heating | Typical melt temperature: approximately 200–280°C | The correct temperature provides sufficient flow without excessive degradation or discoloration. | Verify actual melt temperature where possible instead of relying only on heater setpoints. |
| Step 4 | Mold temperature control | Often approximately 20–80°C | Higher mold temperatures can improve surface finish and reduce residual stress, while lower temperatures may shorten the cycle. | Monitor supply and return temperatures and confirm stable cooling across the mold. |
| Step 5 | Clamping and mold closing | Clamp force selected from projected area, pressure, and safety margin | Adequate clamping prevents flash while avoiding unnecessary machine loading. | Check parting-line flash, mold alignment, platen condition, and clamp-force settings. |
| Step 6 | Injection or filling | Typical injection pressure: approximately 50–150 MPa | Injection speed and pressure must fill the cavity before the gate freezes while limiting shear, jetting, and trapped air. | Monitor fill time, pressure profile, screw position, short shots, weld lines, and burn marks. |
| Step 7 | Holding and packing | Commonly about 30–70% of peak injection pressure; optimized by testing | Holding pressure compensates for material contraction and helps prevent sink marks and internal voids. | Use part weight, dimensions, and gate-seal studies to establish the holding-pressure duration. |
| Step 8 | Cooling | Often the largest portion of the cycle | Controlled cooling allows the part to solidify sufficiently for ejection and helps limit warpage and residual stress. | Check ejection temperature, cooling-channel balance, flatness, and dimensional stability. |
| Step 9 | Mold opening and ejection | Ejection force depends on shrinkage, surface area, draft, and texture | Balanced ejector layout reduces distortion, whitening, drag marks, and damage to thin features. | Inspect ejector marks, deformation, sticking, and automatic part removal reliability. |
| Step 10 | Trimming and post-molding operations | Gate vestige and flash removal as required | Secondary operations can improve appearance, fit, safety, and assembly performance. | Check gate vestige height, flash limits, cleanliness, labeling, and assembly compatibility. |
| Step 11 | Inspection and process validation | Dimensions, appearance, weight, function, and material traceability | Validation confirms that the process consistently produces parts that meet the approved product requirements. | Use first-article inspection, capability studies, control charts, and functional testing where appropriate. |
| Common Defects and Corrective Actions | ||||
| Defect control | Warping | Often linked to uneven cooling, wall-thickness variation, or fiber orientation | Warping can affect assembly, sealing, and visual quality. | Balance cooling, improve mold design, review packing conditions, and maintain more uniform wall thickness. |
| Defect control | Sink marks or voids | Often associated with thick sections and insufficient packing | Localized shrinkage can create visible depressions or internal cavities. | Reduce excessive thickness, improve coring, optimize holding pressure and time, and verify gate freeze. |
| Defect control | Short shots | Insufficient filling before the material freezes | Short shots result in incomplete or unusable parts. | Check material temperature, injection speed, pressure, venting, gate size, and machine capacity. |
| Defect control | Flash | Material escapes through the parting line or other clearances | Flash may interfere with assembly and indicate excessive pressure or mold wear. | Reduce excessive pressure, inspect parting surfaces, verify clamp force, and repair worn tooling. |
| Note: The values shown are typical engineering ranges for unfilled polypropylene injection molding. Actual settings depend on resin grade, additives, part geometry, mold construction, machine capability, and product requirements. The material supplier's technical data sheet and validated process trials should be used for final specifications. | ||||
Polypropylene injection molding offers a practical balance of low weight, chemical resistance, and production efficiency. Its density is about 0.90 g/cm³, lower than many common engineering plastics. Lightweight matters. Products can use less material while maintaining useful stiffness. PlasticsEurope reported that polypropylene represented roughly 10% of global plastics production in its Plastics – the Facts 2023 report. That scale supports broad processing experience and stable technical knowledge.
The material also suits living hinges, snap fits, thin walls, and integrated ribs. Its fatigue resistance helps repeated-use closures survive frequent opening. Designers should add generous radii and consistent wall thickness to reduce sink marks and warpage. A 2024 injection molding cost analysis from an independent manufacturing research publisher identified cycle time, part complexity, and material usage as major cost drivers. Polypropylene can address all three when the mold is designed carefully. It flows well, fills detailed cavities, and supports fast cycles.
It is not automatically the best choice. Low-temperature impact performance may require testing, especially for outdoor products. Warpage can still appear around uneven ribs or thick bosses. Production teams should validate cooling, gate location, and shrinkage with trial parts rather than relying only on simulations. The material can feel less rigid than reinforced alternatives. That limitation deserves honest attention. For food-contact or medical applications, compliance must be confirmed for the exact grade, additives, process, and market. Small design decisions matter.
Polypropylene injection molding suits products that need low weight, chemical resistance, and efficient high-volume production. Common applications include food containers, storage bins, appliance components, automotive trims, and flexible living hinges. Its low density can reduce material use, while its natural moisture resistance supports repeated handling. In practical production, thin walls and fast cycles can lower costs. However, performance depends heavily on the selected grade and mold design.
PP is not a universal answer. It can disappoint. The material may shrink unevenly, causing warpage around ribs, bosses, or thick sections. Its stiffness also drops at elevated temperatures, and unmodified PP can degrade under prolonged ultraviolet exposure. Painted or bonded surfaces may require special treatment because PP has low surface energy. A part that looks efficient on paper may still fail during assembly. That risk deserves early testing, not optimistic assumptions.
Selection should begin with the product’s working temperature, load, chemical exposure, and expected service life. Compare melt flow rate carefully: higher flow can fill complex cavities, but it may reduce toughness in some designs. Consider impact-modified, glass-filled, flame-resistant, or UV-stabilized grades only when testing supports the choice. Maintain consistent wall thickness, generous corner radii, and suitable draft angles. Prototype trials should check shrinkage, hinge fatigue, impact strength, and dimensional stability. Recycled content may improve sustainability, but batch variation can affect color and mechanical performance. Record those differences before approving production.